Hobie TI barber hauler loop and experimental boom
Update 4/25/19 to change the way the experimental boom is connected and disconnected (section below)
Barber Hauler Loop
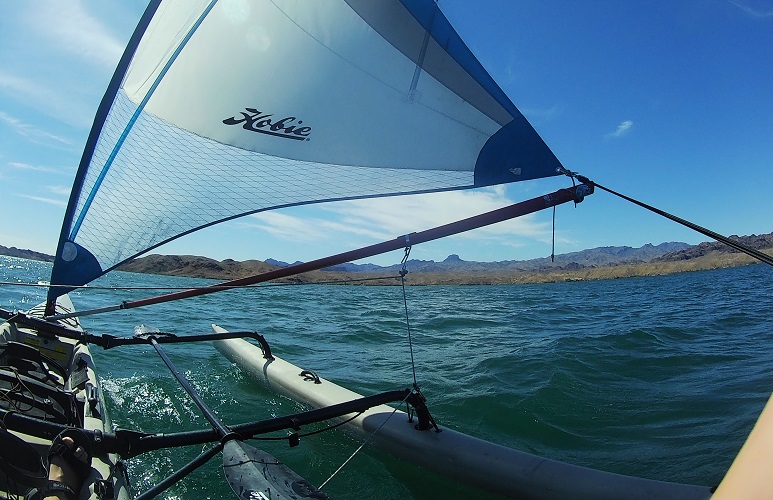
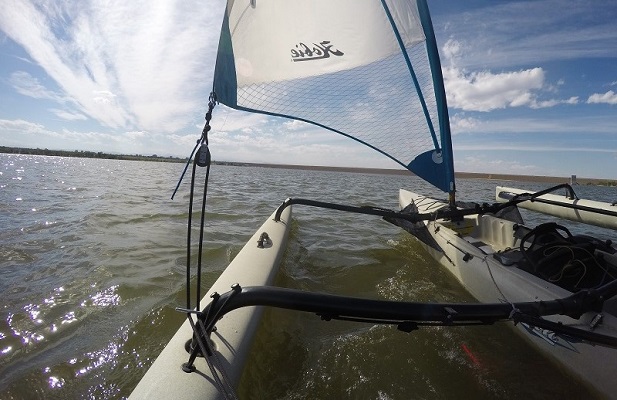
Picture below. Barber hauler loop (one line only) is being used to pull the clew of the sail out towards the Ama while downwind sailing. This is a simple setup that's easy to use.
First, three pictures of some other ways to improve downwind sail shape that I have tried in the past. I am not currently using the first two but am using a version of the third picture in the next sequence.
Below: No longer used method using the paddle as a whisker pole. Helps down wind. When one end of the paddle is holding the sail clew out, the other end of the paddle will push towards you fairly hard and its somewhat cumbersome to use.
Below. No longer used Aka "pin". There is a pin on the Ama braces (Aka) on both sides the boat. I would use the paddle to place the sheet rope over the pin and the sheet would be held like in the picture below. This had reasonable down wind sail shape but it was a hassle using the paddle to change sides with tack change. You also had to use the paddle to release the sheet off the pin for normal sailing. Difficult/ hassle to use in anything other than very light winds.
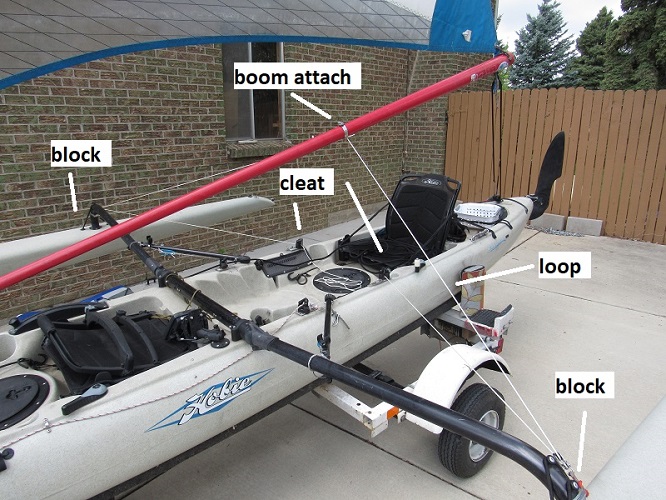
Below. What I'm currently using is based on. This is an idea I got from Doug Ames in Lake Havasu Az and is the bases for what I am using now (and like a lot). There is a line on either side of the boat with a cleat on the coaming and a block at the end of the Aka (brace that holds the Ama). The end of the line has some a metal hook that you manually attach to the sheet line near the clew of the sail. Each side of the boat has the same setup.
I thought it worked a lot better than what I had tried before. The only problem was that each hook only worked on one side so you would have to unhook one side and hook in the other side any time there was a tack. And if you dropped the hook in the water while doing this, it was somewhat of a pain to retrieve the hook/ line.
Doug also uses this setup to pull the sail sheet over to one side when the sail is furled so its not banging on the rear pilots head. Also a great use.
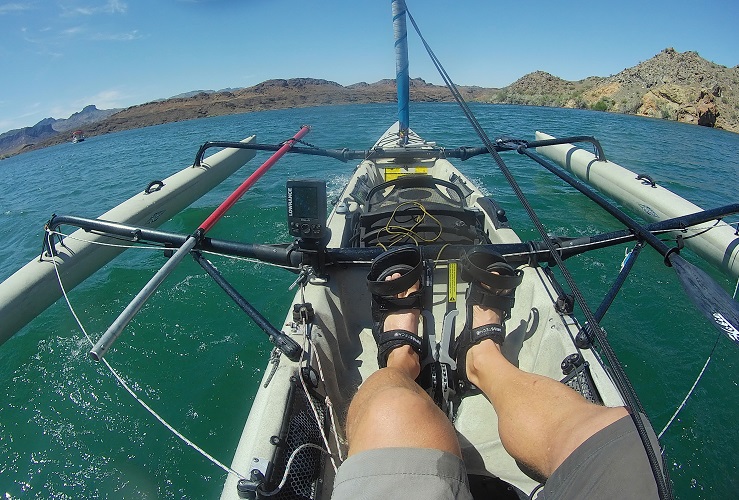
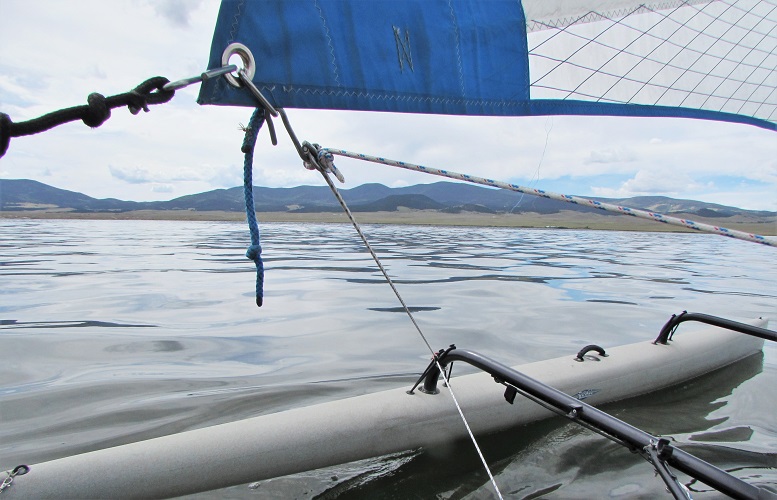
Below (two pictures): Next step was to try a loop that attached to the outside of both Aka's (Ama braces) with only one hook. With the loop, tack changes are easier since you don't have to mess with the hook, just leave it attached all the time. One side of the line is let out while the other side is pulled in (line on the side being let out is not cleated, cleat on the other side you are pulling in captures the line). Sounds a little complicated but its been easy to use. Picture below showing the single line loop with one hook attached to the sail clew.
Next two pictures below. Loop line is 26 ft cut length (might vary a little depending on where the cleats are placed on the coaming, hook, etc but this is what I have in the pictures). The pictures show the loop length with the sail fully unfurled (sailing position). This seems like a good length as I can still leave the hook attached to the clew even when the sail is fully furled. With this length for the loop line, I can use the barber hauler loop to improve downwind sail shape over the entire range of reefing.
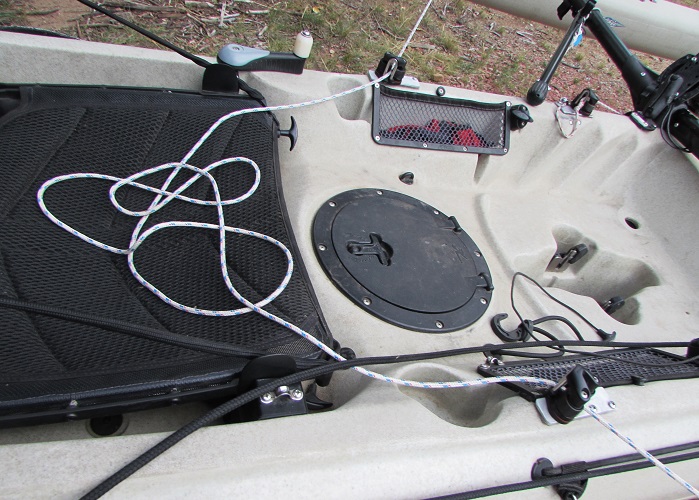
Below. When sailing, the extra line for the loop is resting in the area of the hatch just in front of the seat (cut line length of 26 ft in the picture).
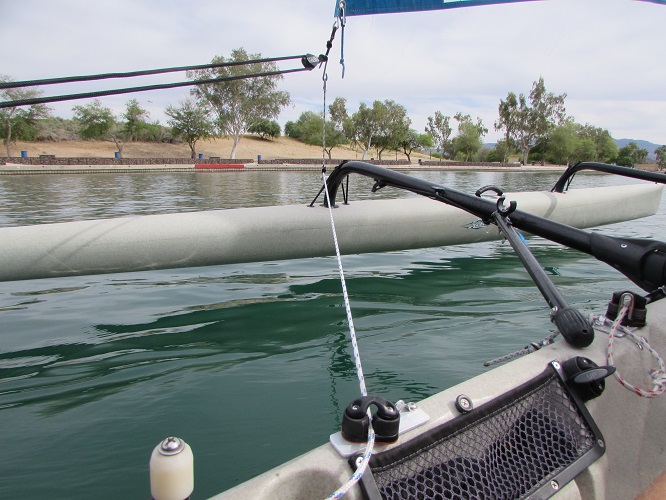
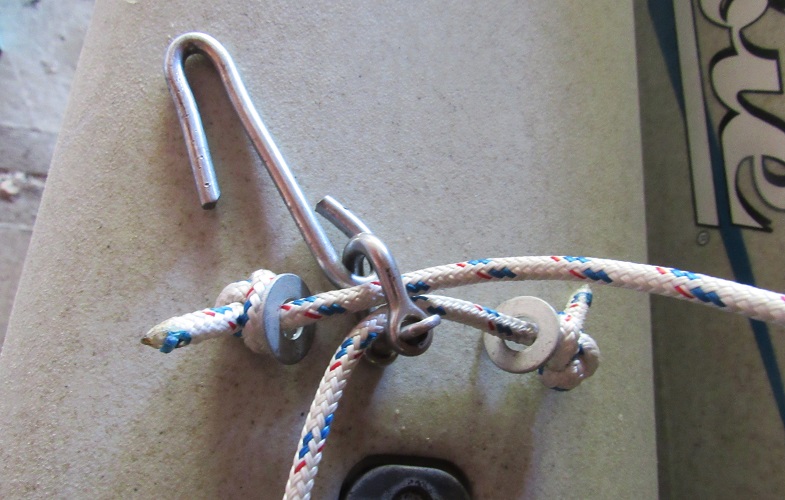
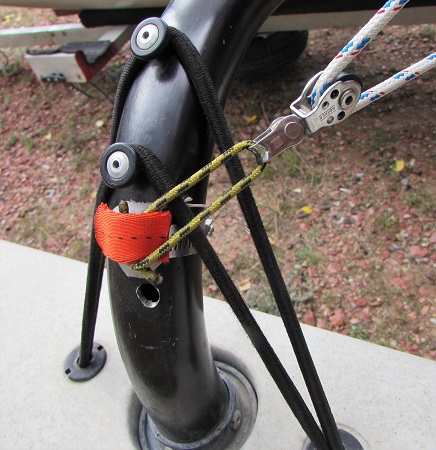
Picture below. I was concerned about the loop line twisting during use and then binding so I made sure each end was captive to the hook but the line could still rotate. This has been completely trouble free but I also didn't test it without the free rotation to alleviate any line twisting.
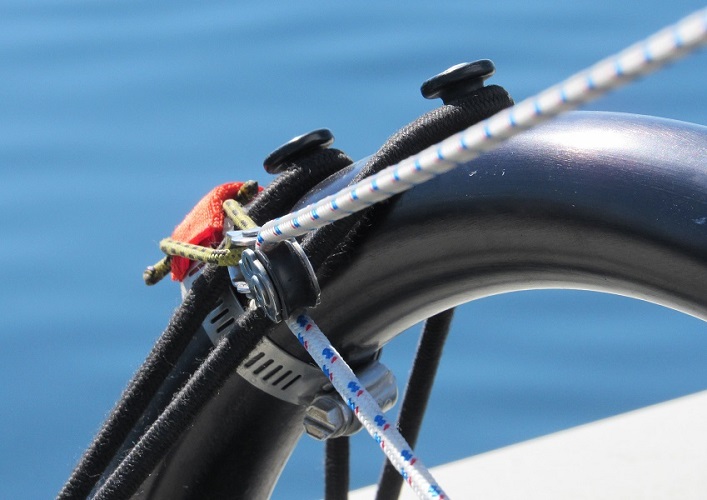
Picture below. I had drilled some holes in the Ama braces for a previous mod so did not want any additional holes. This has worked well but of course not the only way to do this.
Below.. did I mention a big ol hole I wish I had not drilled (pin experiment that I abandoned).
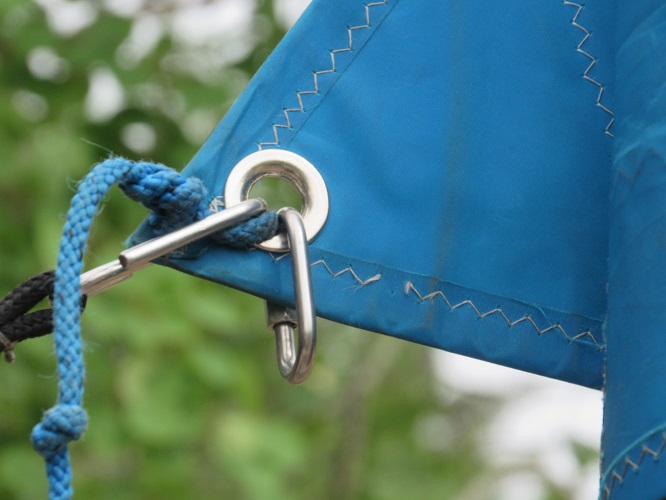
Two picture below. An oval bolt was added to the sail clew. The barber hauler hook attaches to the oval bolt. (the boom experiment shown last in this page also uses this oval bolt for attaching the end of the boom).
Additional control of sail twist experiment
I noticed that I could control sail twist with the barber hauler so explored this aspect a little more.
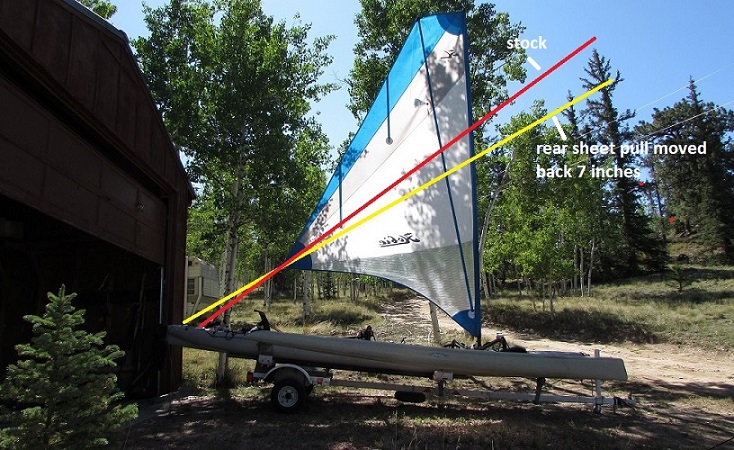
A headsail on a common sailboat Bermuda rig has similarities to the Hobie sail in that there is no boom and the forward to back location of the headsail sheet pull point will affect the twist of the headsail. In higher winds, the pull location is moved backwards and this opens up the leach of the sail and increases the twist. In light winds, the pull point is moved forward and this tightens the leach or reduces twist. A common method to find the starting nominal point for the head sail pull point is to draw an imaginary line starting at the pull point, then through the clew of the sail, then to the luff of the sail. The line should about bisect (half above, half below) the luff. The Hobie main sail is different in that it has a bendy mast instead of a wire forestay but in the picture below, the red line shows about where this imaginary line intersects the mast with the stock setup and it is relatively high. We cant compare apples to apples because of the bendy mast but on a sailboat foresail, this would be the lighter wind position with less twist.
Since I can use the barber hauler setup with a sort of "three dimensional sheet pull" to pull down on the clew and reduce twist, I moved the main sheet attachment point backwards 7.5 inches. This resulted in opening up the leach (which I thought my early 2015 sail needed a bit more of but could be wrong) however I can still use the barber hauler and add some down force and reduce the twist. I.e., this gives some sail twist control which I have been playing with and am liking.
A small benefit is that moving the sheet attachment point back a little gives a little more head clearance for the person sitting in the back.
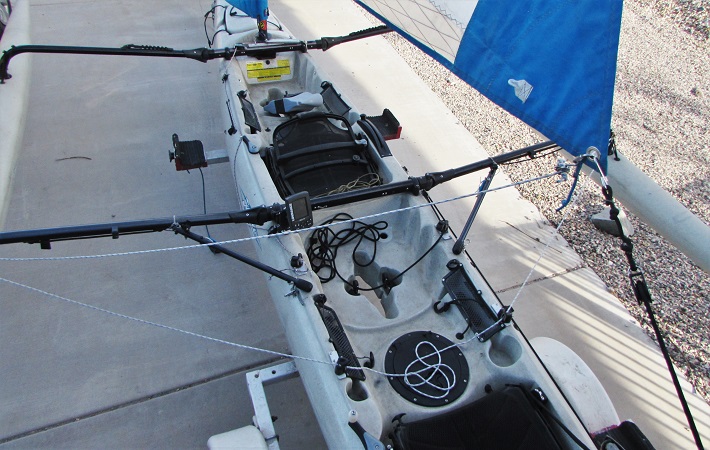
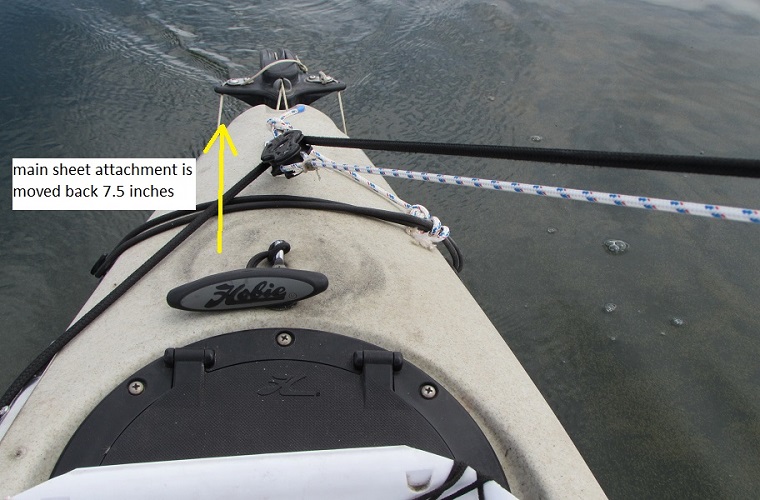
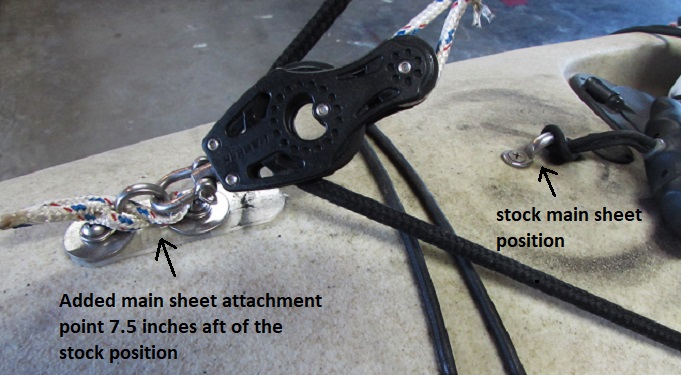
Next two pictures below. Moving the main sheet attachment point aft by 7.5 inches in order to open the sail leach a little bit when no barber hauler down force is applied.
Boom experiment
The boom gets away a little from one of the main reasons I like the TI - very simple and fast setup. You also can only use the setup described here when sitting solo in the rear seat. However, its somewhat interesting performance wise so added here. The boom also acts as a whisker pole and you can get about everything possible out of the single sail for down wind and I think it definitely makes a difference. It also "seems" that it helps in light winds as the boom gives better shape for larger sail angle of attack. The boom does the least when pointing as the existing sheet can do everything the boom does. I think it would be interesting to try this type of boom on one of those long distance races where you would be sitting in the rear seat and camping gear would be in the front seat area.
FYI, a modification to the boom was made in April 2019 that makes is WAY easier to release the boom from the clew even in higher wind. This is important since you can not furl the sail with the boom attached.
I use the barber hauler setup with the boom to control sail shape. With the boom, the barber hauler also "sort of" works as a boom vang and even a traveler.
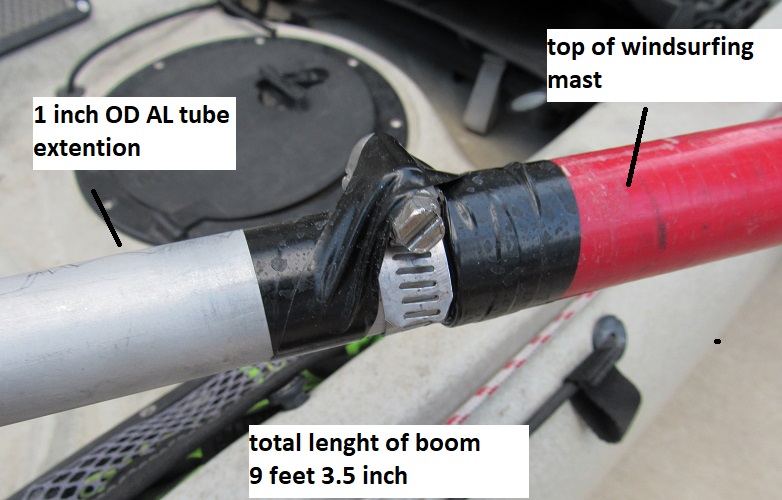
The boom implementation here used the top portion of a carbon fiber windsurfing mast. Total weight added was under two pounds..
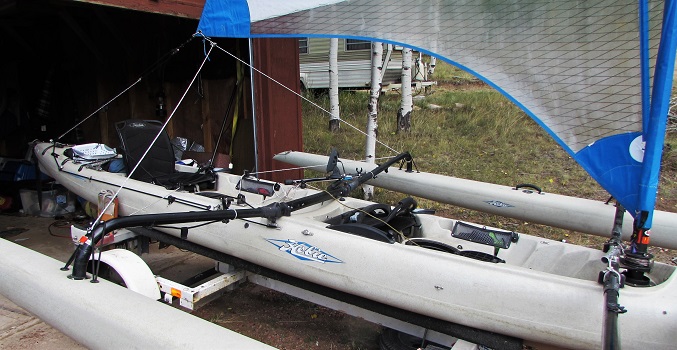
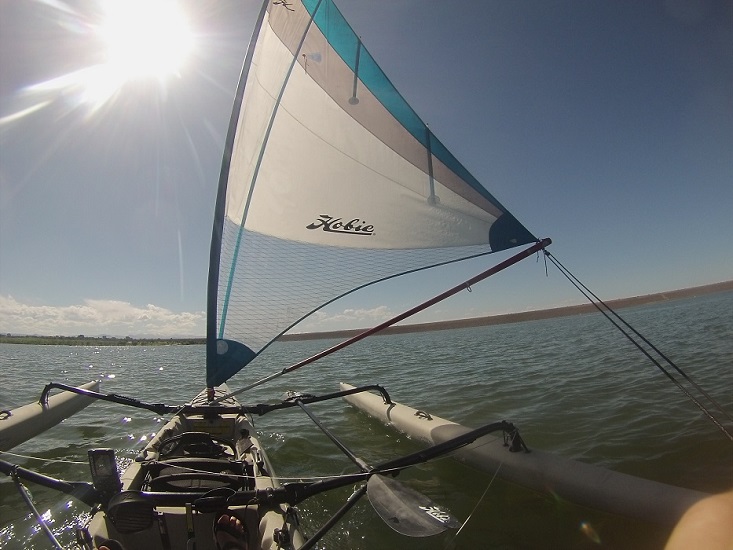
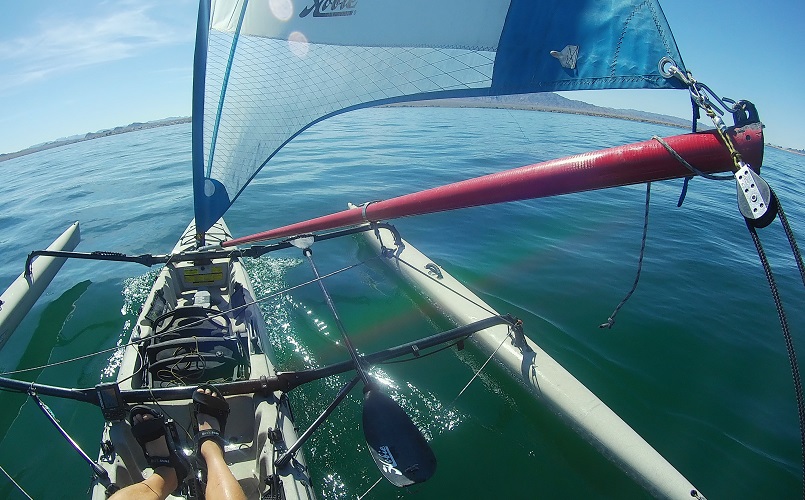
Picture below. Boom being used at a whisker pole for down wind sailing. The single sail down wind shape and area are about as good as it gets.
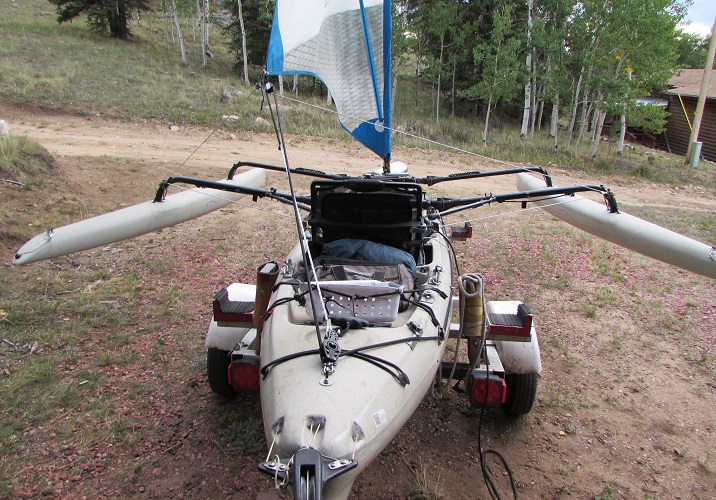
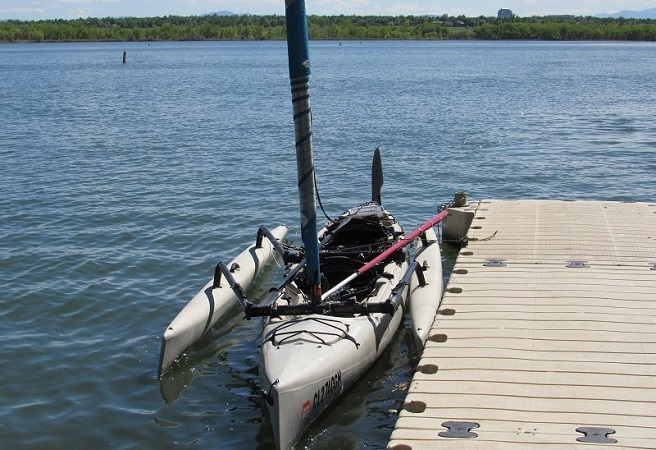
Picture below. I use the capability of the Ama's folding pretty much every time I take the boat out. The boom doesn't interfere with this.
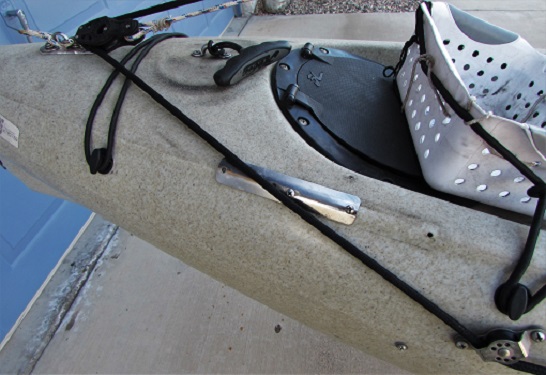
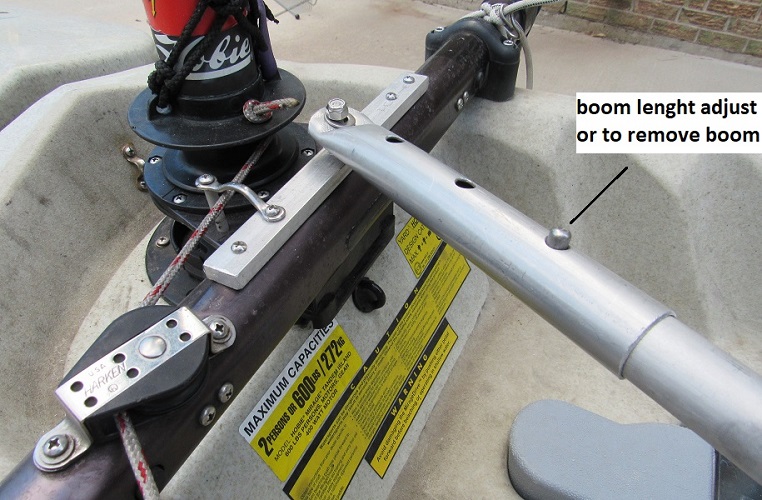
Below. The adjustment in boom length was also intended to be used as an "adjustable outhaul" but this aspect was too much hassle to use. But it makes the boom easy to remove.
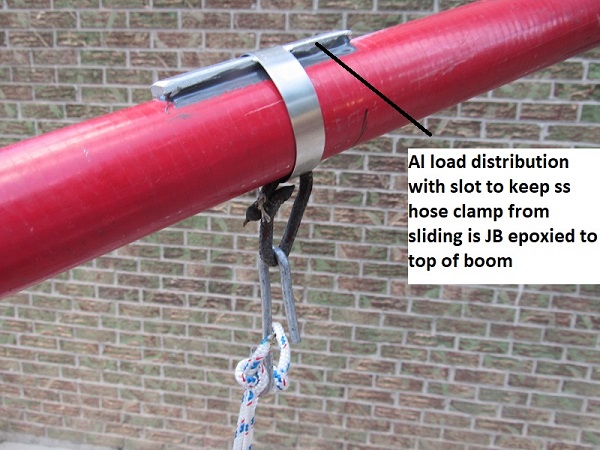
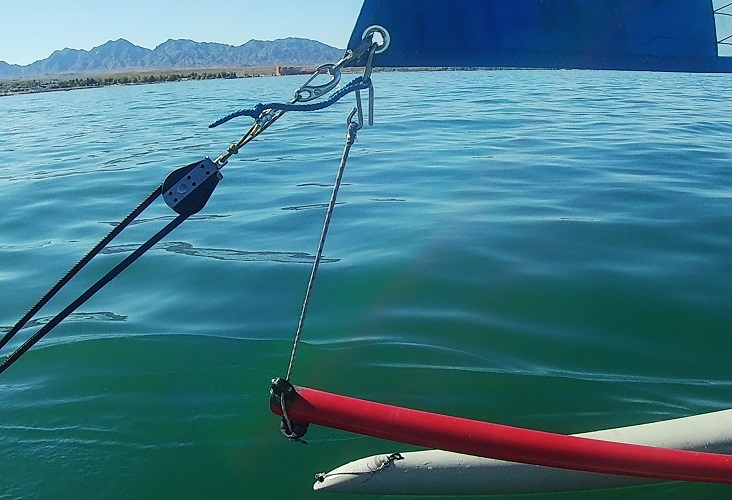
Below. where the barber hauler hook attaches to the boom.
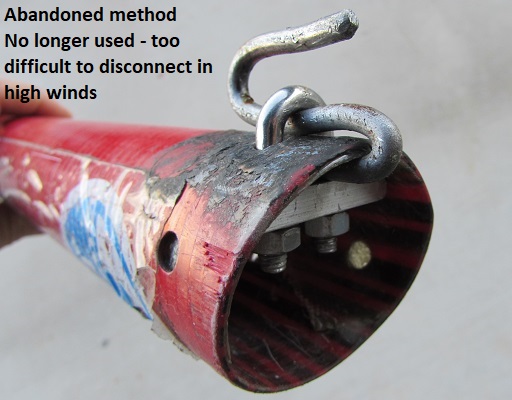
Picture below. This setup is NO LONGER USED as it was very difficult to unhook the sail clew from the boom in higher winds. I abandoned the connection method shown in the picture below.
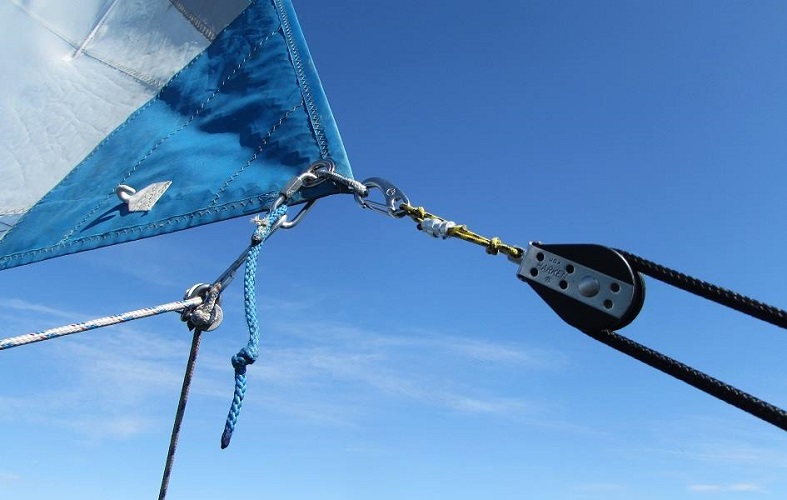
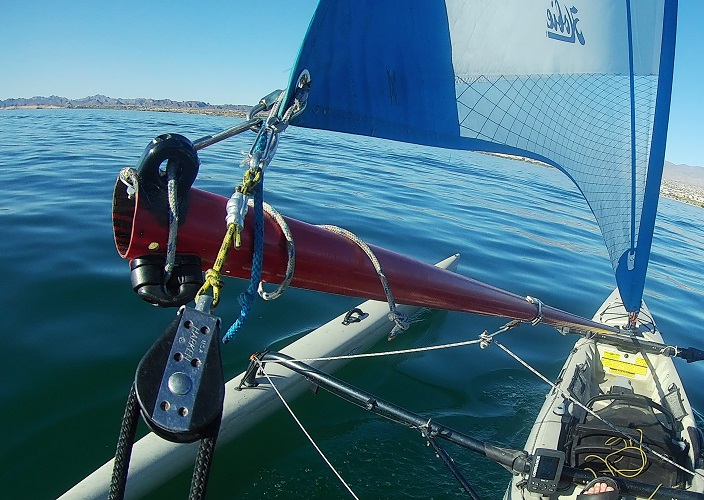
Below: After trying the fixed hook in the picture above and having a real hard time disconnecting the boom in higher winds, I went to a hook on a line through a fair lead and cam cleat so that I can "release" the line during the process of both hooking and un-hooking the boom to the sail clew. This result in very little tension on the line while unhooking and then once hooked, the line is tightened pulling the hook (and sail clew) near the boom fairlead. The line allows the hook to be about 1.5 feet out from the fairlead and there is a stopper knot on the end of the line so that it does not come all the way out when released.
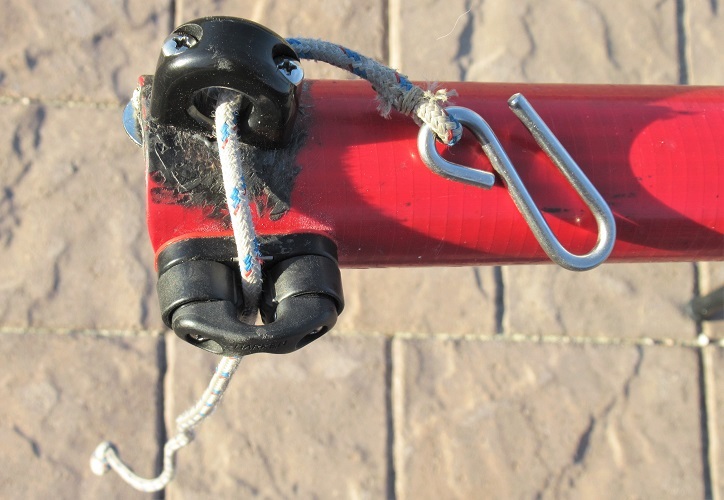
Picture below. This is with the boom hook line released so that there is very little tension on the line. This makes it much easier to both disconnect and connect the hook especially when it is windy (remember you have to disconnect the boom to either reef or furl the sail). Once the hook is in place attached to the sail clew oval bolt, its simple to pull the line in tight.
Picture below - hook line pulled in and cleated. This is sailing mode. I "could" also use the cleat as an adjustable outhaul but have not messed with that yet.
The link below is an eight minute sailing video on YouTube showing the how the boom hook release works even in high winds and some of the interaction between the boom and the barber hauler loop.
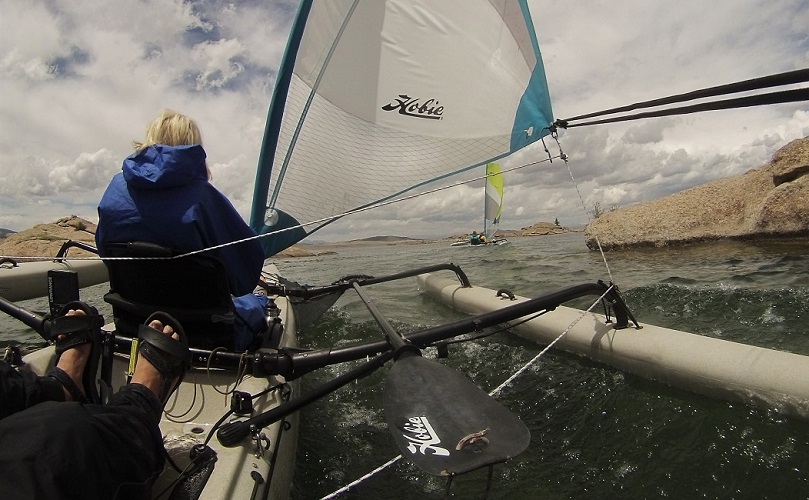
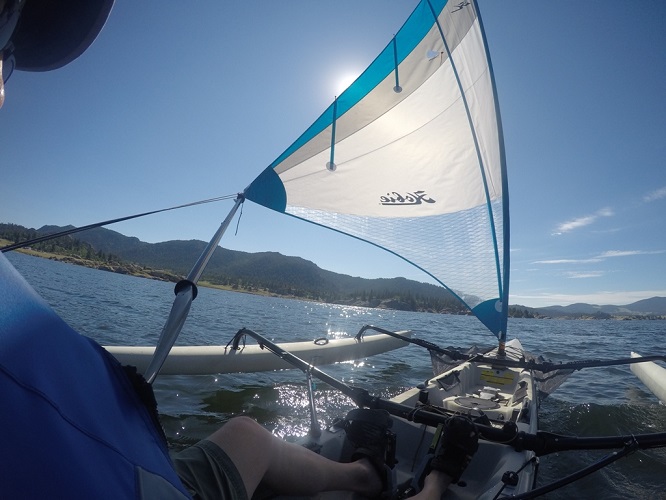
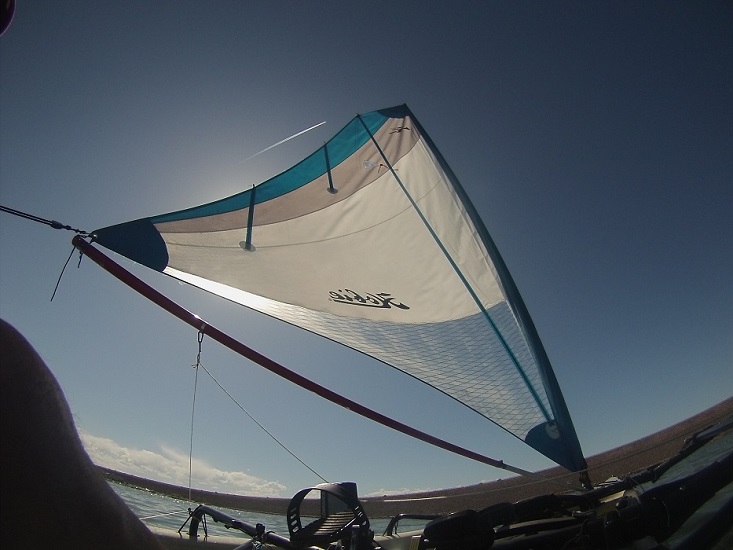
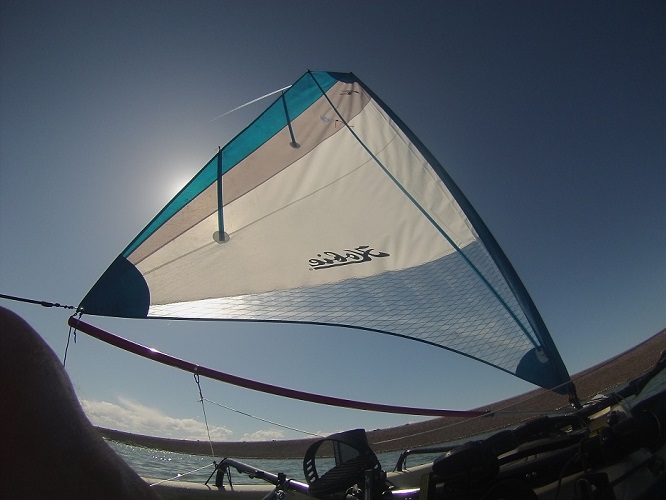
Pictures below. I can adjust sail twist with using the barber hauler setup with our without the boom. The two pictures below show the sail twist controlled by barber hauler tension. The first picture shows little barber hauler tension and more sail twist. The second picture shows more barber hauler tension and less twist and the leach tightened up.
Below - light wind sailing
Picture below, deep reach cruising